Need an Easy Diy on Making Mountain for My Christmas Village
Few things in this world are more important to me than my Christmas village.
I realize that's not a statement that instills confidence in my sanity or connection to reality, but it's the truth and I won't deny it.
Growing up in sunny Florida, Christmas scenes like the ones in TV shows, movies, and magazines were hard to come by. It made me feel robbed in some ways of the true Christmas experience.
For a while, my parents placated my pleas for white Christmases with snowglobes, but that didn't last. Not even the best of snowglobes could fully capture the Christmas world I desired.
So around the time I turned ten, my mom took me to K-Mart for the purchase of my first little porcelain houses.
Those first years, my village was barely a blip on the map.
Five tiny buildings and a lighthouse covered in snow glowed from the surface of the dining room sideboard for years. We couldn't afford more than one addition per year, so growth was small.
And even what new buildings we could construct had to come from the low rent K-Mart district. Nothing like what you see from Department 56 or Lemax was even remotely possible for my budding town.
But by the time I moved back home after college, everything had changed. The Dollar Tree got in the Christmas Village game and suddenly, my miniature city planner dreams were within the reach of my little budget.
In the last three years, my village has exploded without bankrupting me in the process.
I look forward to constructing my village all year — so much so that it is my birthday gift to myself every November, ensuring that I have it up and glowing before my big day on November 11th.
Friends and family have come to admire and love my village as much as I do, so I thought I'd share some key tips for recreating a village in your own home (while still being able to buy gifts for your family and friends!).
1. Create your base from Dollar Tree Items
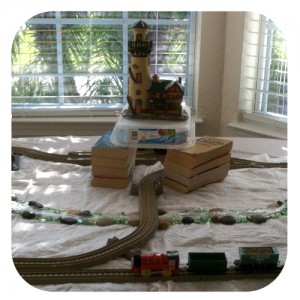
Some people build elaborate styrofoam molds for their foundation, but I haven't reached that level yet. Still, I know it's important to give myself a clean canvas for construction.
So I begin my village with a simple white, plastic tablecloth from the Dollar Tree (it covers your table top and blocks the view of cords running from the tabletop to your wall plugs).
On top of the tablecloth, I lay my first blanket of snow with those cheap, sparkly sheets also found at Dollar Tree. They don't look great, but by the time you cover them with buildings, trees and puffs of fluffy fake snow, no one will notice.
2. Be a "Make Do" Christmas Village builder
You'll want to create some dimension to your village with a few mountains and hills.
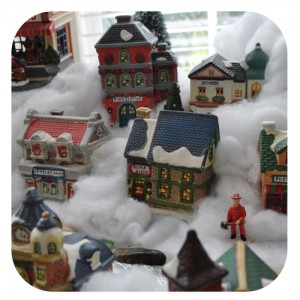
Instead of crowding all your buildings onto one level, adding some "mountains" will give you tiers to create a display where all your buildings can stand out.
So how do you build mountains?
Easy — and free! You can easily use things you have on hand. You'll be covering them with snow anyhow, so it doesn't matter what the item is (just so long as you won't be needing it until after your Christmas village is ready to come down for the year).
The boxes your buildings come in are a great resource for mountains. So are Tupperware containers, paperback books, and miscellaneous kitchen items like bowls and such. Just make sure you've got a flat surface so your building will sit on top.
When you lay out your village, use your found items to create a gradual rise in your tiers for a more realistic effect (and to make it easier if you're using a connected string of lights).
3. Skip the Christmas train, go with Thomas!
Don't get me wrong here — I love a good Christmas train.
I have a Christmas train that goes around my tree, blowing fake steam in the air and making "real" steam engine sounds.
But after fooling with cheap Christmas trains for my village over the last three years, I got smart and called in some assistance from my good friend Thomas the Tank Engine.
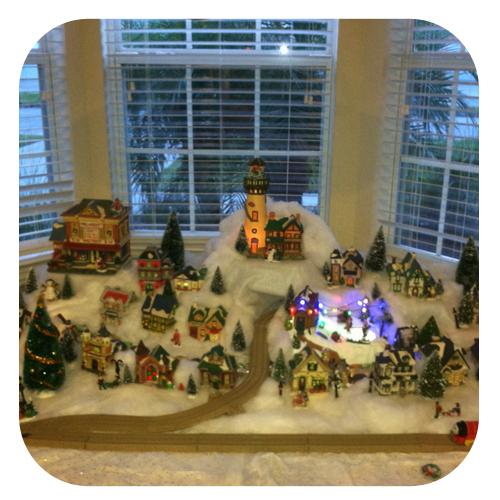
A few advantages to using Thomas over a typical Christmas village train:
- You can buy additional track as your village grows.
- The track is MUCH easier to put together and MUCH more durable than any Christmas train I've worked with.
- You can also purchase new trains, extra cars and other accessories to upgrade your train set.
- Thomas is a better investment because your kids (or in my case, nieces and nephews) will enjoy playing with your train year-round.
This is seriously a no-brainer, trust me!
I actually purchased a different train in the set than Thomas (I think his name is Charlie? Henry? I'm not sure) because it was red and thus more appropriate for my Christmas town.
4. Use one string of white, LED lights to illuminate you whole village
Forget the forty-thousand cords and the hot bulbs up against your fake snow.
It takes a little creativity and a tight layout, but it's worth it to have one cord running off the table.
You can purchase a string of 20 white lights for about $5 and pop all your buildings onto the one string. If you have gaps, you can remove bulbs to create a break or cover the exposed light with some extra snow to give your village a little extra glow in the hills.
If the light cord doesn't fit through the little notches on the bottom of your buildings, you can balance out the added bump of the cord with extra snow or the little gemstones you can pick up at the Dollar Tree.
In my village, I have individual bulbs going to my Walmart and Lighthouse, but all the other buildings are connected to one long string of lights.
5. Don't be afraid to mix and match building sizes
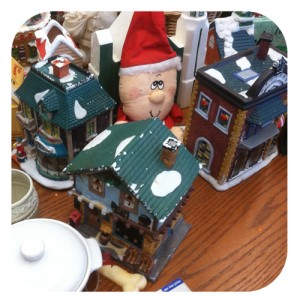
Thrift stores are actually a GREAT place to find buildings for your Christmas village (and other items, too, check out this blog post with 6 tips for a thrifty Christmas village).
The picture here is from one of our local thrift stores — they had several buildings in great condition for a steal! Just be sure and ask if you can test them before buying and hold them up to a light to see if they're porcelain (which will be brighter) or ceramic (darker, more like the cheap ones from the dollar store).
You'll wind up with some size differences in your buildings, but you can mask that by using your make-do mountains to create perspective. Place bigger buildings in the front of your village, with the smaller ones up on a tier toward the back creating some distance perspective.
It's super easy and will lend an eclectic feel to your Christmas village!
6. Add a water feature without using water
The stream running through my village has the look of running water, but in fact it's made in about five seconds using an item we all have on hand in our kitchen: plastic wrap.
Take a long strip of plastic wrap and scrunch it up into a narrow tube. Wind it through your village like a babbling brook (hint: it can be a great way to cover exposed cords and such, too).
You can anchor your stream with some river rocks from the Dollar Tree and make it a little more realistic by adding a bridge or two (also available in the village accessories from Dollar Tree).
7. Use touch-up paint to add flair
Some of the Dollar Tree houses can be a little sad, but you can perk them up with some new paint.
You can paint over building labels and rewrite them (some of the Dollar Tree houses have scrawled, barely legible signs for their store names), fix any chips/scratches or enhance some features.
For example, my nicer homes from the early days of my collection have glitter in the snow. I used kids' silver glitter paint to add the same effect to my cheap, dollar store houses.
Bonus Tip!
One more thing — even though you're on a budget, you should splurge on one thing every year.
I bought my animated skating rink two years ago and its since become the the centerpiece of my village. It was a Walmart purchase, but if you were feeling especially Daddy Warbucks-ish you could make a trip to your local Michael's for a cool animated item, accent piece or other feature to add to your village.
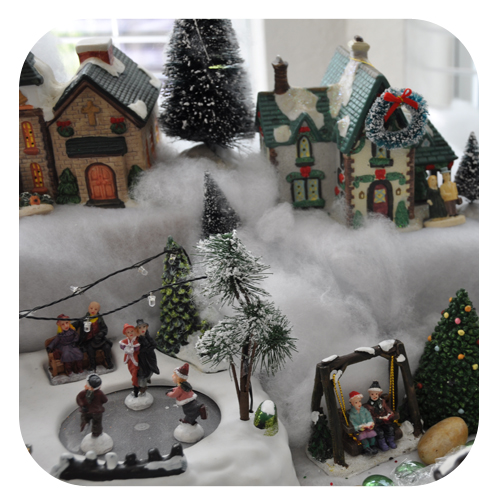
Most of all, you village should be a fun addition to you holiday decorations that the whole family can enjoy!
Check out this video of my completed Christmas village:
Source: http://shannononeil.net/2012/12/07/christmas-village-tips/
Enregistrer un commentaire for "Need an Easy Diy on Making Mountain for My Christmas Village"